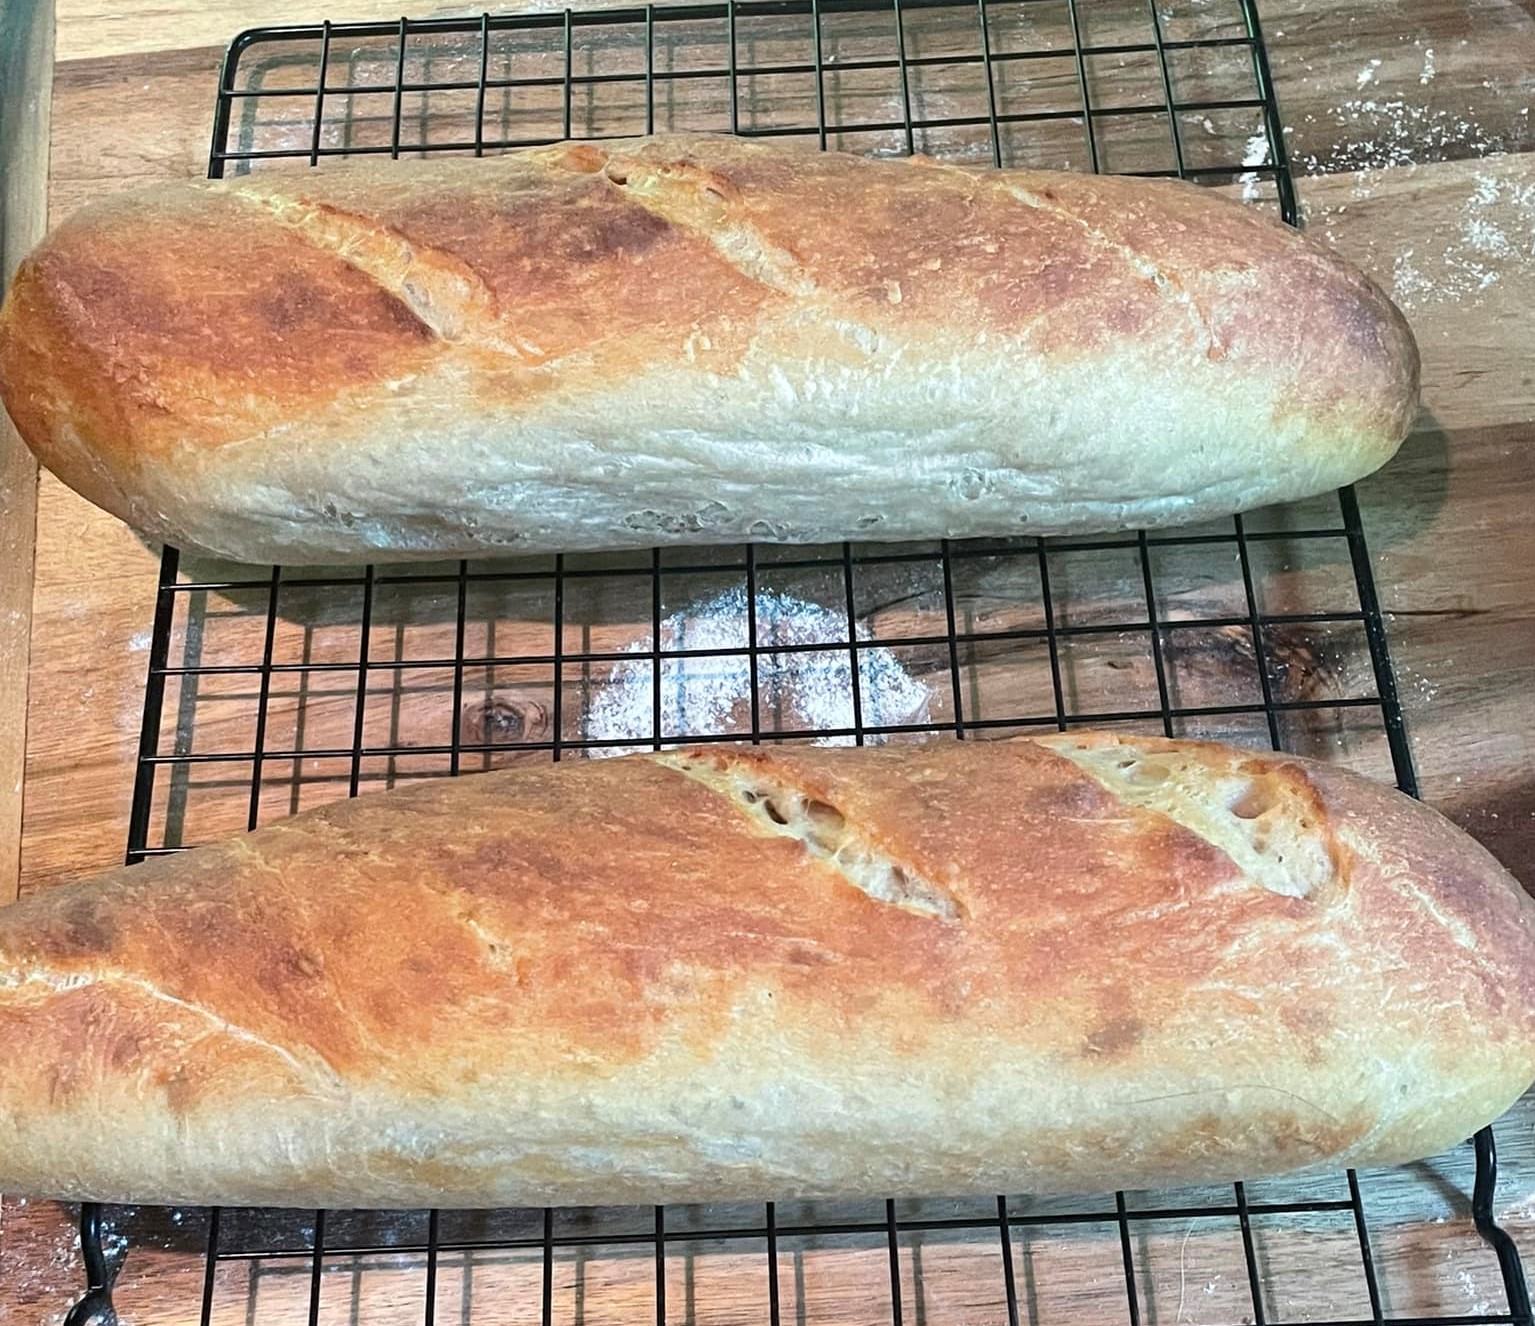
We amazed ourselves. This recipe has been tested and passed with honors. It is definitely a clone of our French baguettes.
We heated it up in the oven at 350 for 13 minutes before serving. It turned out crisp on the outside and melt-in-your mouth chewy on the inside, and full of flavor. We could not tell the difference between this and the original, and this was shocking because it has just 24 g carbs, while the original French Baguette has 120 g carbs.
So enjoy!
Ingredients

Starter (poolish)
- 6 oz (170g) water, cool
- 1/16 teaspoon active dry yeast or instant yeast
- 1 cup (120g) King Arthur Keto Flour
Dough
- 1 ½ teaspoons active dry yeast or instant yeast
- 11.25 ounces (1 cup + 3.25 ounces or 330g) water, lukewarm
- all of the starter (poolish)
- 3 ½ cups (418g) King Arthur Keto Flour*
- 1 Tablespoon Celtic Sea Salt
Notes
This is a French recipe, and the word “poolish” is how the French say Polish. This is a starter that sits for at least 14 hours, and bubbles up (ferments). It’s easy to do, you just have to wait a day to taste these delicious baguettes.
Instructions
Weigh your flour on a good kitchen scale; or measure it by gently spooning it into a cup, then sweeping off any excess.
To make the starter: Mix everything together to make a soft dough. Cover and let rest at room temperature for about 14 hours; overnight works well. The starter should have expanded and you might find bubbles. (If your home is “cool,” turn the light on in your oven and let the starter sit in there overnight.)
To Bloom or Not to Bloom
Blooming your yeast isn’t very tricky, and will make your baguettes even lighter and fluffier inside. It does add two grams of carbs to each baguette. You can choose to bloom your yeast or not, so for those of you who do choose, here is how you do it.
Ingredients
- 1 teaspoon sugar or honey (local honey is always best)
- 1½ teaspoons Active Dry Yeast (don’t use the instant)
- ¼ Cup (59 grams) Lukewarm Water (about 110 – 120 degrees Fahrenheit)
Note: you’ll have to subtract 59 grams of water from the water you’ll add later to mix up the dough, thus you’ll use 9.25 ounces of water or 271 grams when you put everything together to make the dough.
Directions
In a bowl (a cereal bowl is the right size) place your honey and pour in the lukewarm water. Stir this up and when the honey (or sugar) is completely blended into the water, sprinkle the yeast on top. Let it sit there a few seconds, and then stir in thoroughly. Wait ten minutes. That’s it.
Mixing the Dough
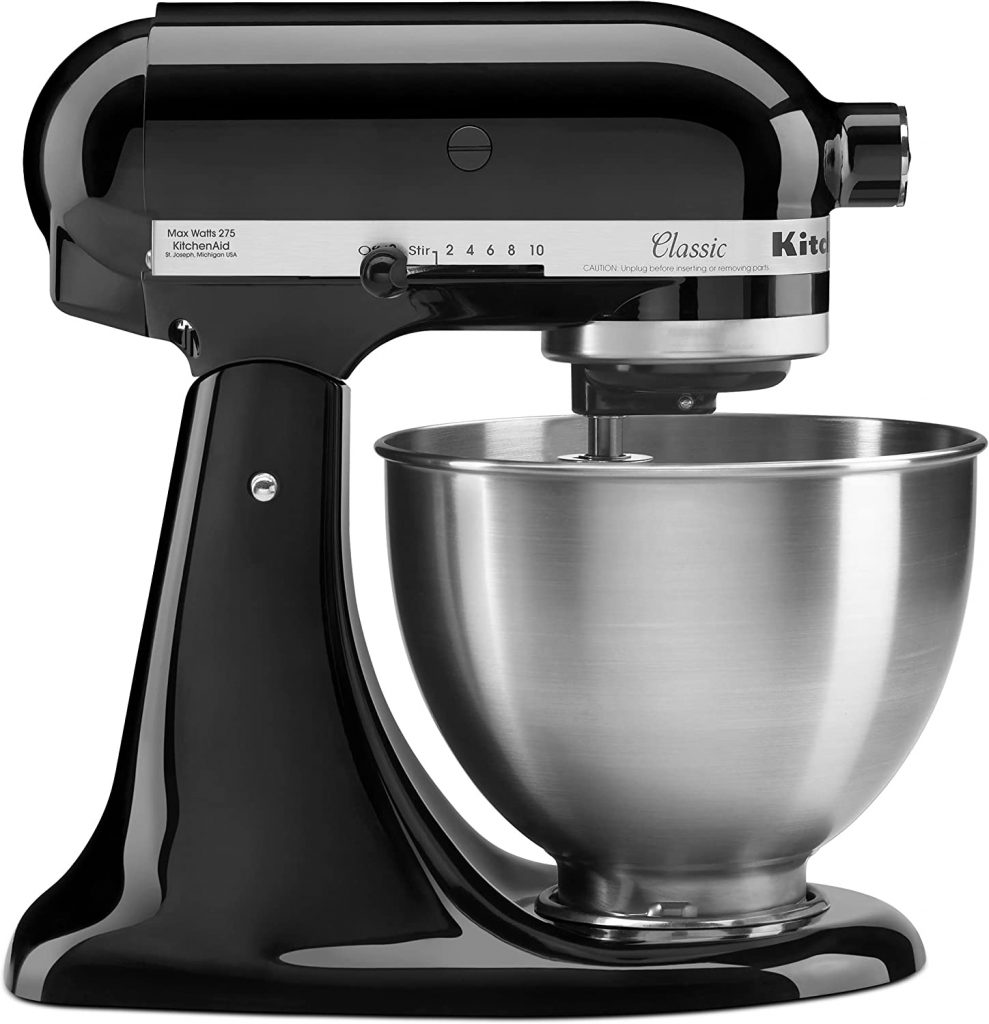
We use a mixer with a dough “hook” and the mixer set on the first or second setting. Put your flour, salt, and all the poolish in your mixing bowl. If you didn’t bloom your yeast, you can add it now. Start up the mixer and add the water. Mix until the dough comes off the side of the mixing bowl. This takes about 4 minutes.
Don’t worry about anything sticking to the bowl. Just scrape out as much as you can onto a breadboard that is wet (so it doesn’t stick) and also wet your hands. You’re going to want to knead the dough with your hands to improve the mixing of everything together, and let’s face it, your hands can tell that a lot better than your eyes.
Scrape all the dough up and place into a lightly greased bowl and cover (we use Tupperware).
Now we proof.
Proofing
Proofing in baking is the period you allow your dough to rise. We’re going to proof the dough ONCE for 45 minutes. Why just once? The yeast works on the starch in the flour. This flour has less starch. So just one proofing.
If you are a novice, you’ll want to go to this page: French Baguettes and jump down to the proofing section to watch the video. We learned a lot from this guy. Just remember: only one proofing.
Proofing Temperatures
Many worry about the temperature of their kitchens because the temp can fluctuate quite a bit from summer to winter. Here’s a nice solution for your proofing: Boil up water in a pan and place it in your oven and do your proofing there. This method has never failed me.
After Proofing
We learned from an Italian baker the best way to fold the dough after proofing. You don’t take it out of the bowl, but reach across to the other side, lift “some of” the dough and bring it to the center, then turn the bowl and do it again, and finally flip it all over, and place it on a bread board that has been sprinkled with flour.
From King Arthur Baking we learned:
Handle dough gently during shaping. Forget all you’ve heard about punching and slapping your dough. When you’re deflating dough at any point during its fermentation process, simply fold it over gently onto itself. And when you’re shaping, you don’t want to expel the air; just make sure the dough is smooth, without huge air pockets.
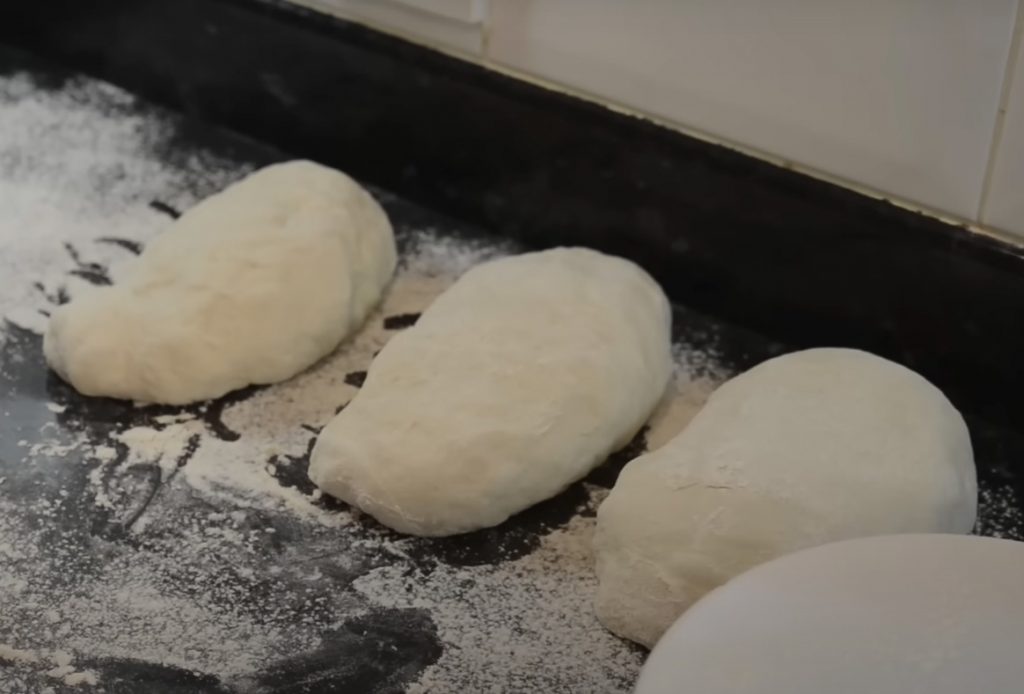
Now we separate the dough into TWO or THREE equal parts (your choice depending on the size of your baguettes) but instead of a wet breadboard, we want you to sprinkle flour on it and keep the “sifter” handy to sprinkle on your dough. Dough that has a bit of flour on it is easier to work with.
Once you’ve separated the three equal parts (or two), you’re going to form three little guys (they might even have a name but we don’t know it) that look like this:
You’re going to cover these with a lightly oiled cling wrap for fifteen minutes.
However . . . if you want to add . . . .
If you want to add some goodies to your baguettes, this is the time to do it. Your goodies could be hot peppers, or garlic cloves, Kalamata olives, sundried tomatoes, or whatever. This is the time to do it. Roll out the dough, press your garlic cloves (goodies) into the dough, then roll them up into these little things you see in the above image.
One Last Rise

Shape your baguettes and place them on a baguette pan covered in baking parchment. You do not have to grease/oil the parchment because they won’t stick. Let them rise 20 minutes and then preheat the oven to 400 degrees. On the bottom shelf of your oven should be a large steel pan filled with boiling water.
When the oven is ready, so will your baguettes be ready. And you can just put the pan in the oven. But first you have to score them. We’ve found that a razor blade is the best tool for this, and make sure to spray the baguettes with a bit of water. As our chef friend in the video tells us, spraying with water makes them score more easily.
However, because of the high fiber in the flour we’re using, these baguettes really do not score well. And if not scored, they also don’t burst open either.
Put the pan in the oven, and give one last spray of filtered water.
After eight minutes of baking, turn them round so they bake evenly.
Then bake till they’re golden brown.
The best time to eat a baguette is right away, but that’s not possible when you’ve planned to share them with company a bit later.
They can sit out for one full day. Then you’ll want bag them for another day. Then put them, bagged, into the fridge or freezer depending on how long before they’re going to be eaten.
Serving
You loved the crisp crust and soft, melt in your mouth inside the moment you bit into your still warm baguette, and you’ll want to reproduce that again for your guests.
Heat the oven to 350 Fahrenheit and then place the baguette straight onto the rack. Ten to fifteen minutes is all you need and now you can serve the perfect baguette.

We made up a nice creamy garlic butter to spread over them and, as one friend put it, “Mmmmmm.”
How to Measure Flour
When you get these down, experiment experiment experiment. Try some sundried tomatoes, a variety of spices, or cheeses. Just remember, being a great baker is more important than being a great lover. (Who said that? Dunno. I guess I did.)
Questions?
And if you have questions or suggestions, PLEASE LEAVE A COMMENT. This is how we learn . . . together.
You Might Be Interested in This
Low Carb Pasta (this flour makes an amazing low carb pasta!)
Note: we link to our affiliate programs because we are a charity and we’re broke and when you support our affiliates you are supporting us and keeping these pages on the internet.


